Table of Contents
Missed calibrations happen most often because nobody stopped to ask what the vehicle actually has installed on it beyond what the scan showed. That distinction sat at the center of two recent webinars hosted by Revv and the United ADAS Collective’s Joel Adcock and Ron Racine, founder and owner of Technical Training Developers, and a member of UAC's advisory board.
Between the two sessions, he covered the fundamentals of what cameras, radar, and ultrasonic sensors do and where they live on a vehicle, then went a level deeper into how the whole system works together, sensor by sensor.
This piece pulls the two sessions together into one summary. If you run a shop or handle estimates, here's what you need to take from both.
Where do ADAS sensors live on a vehicle?
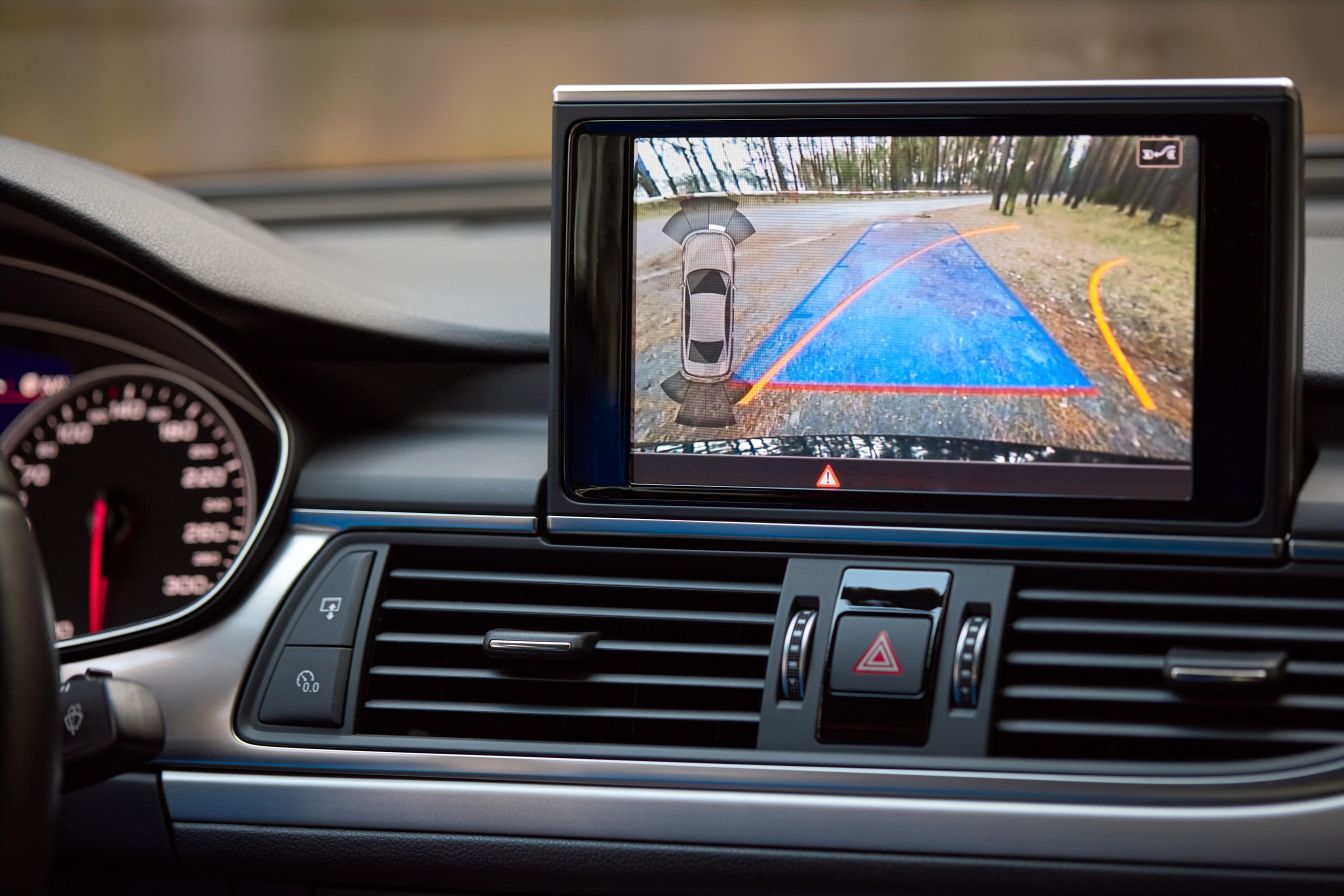
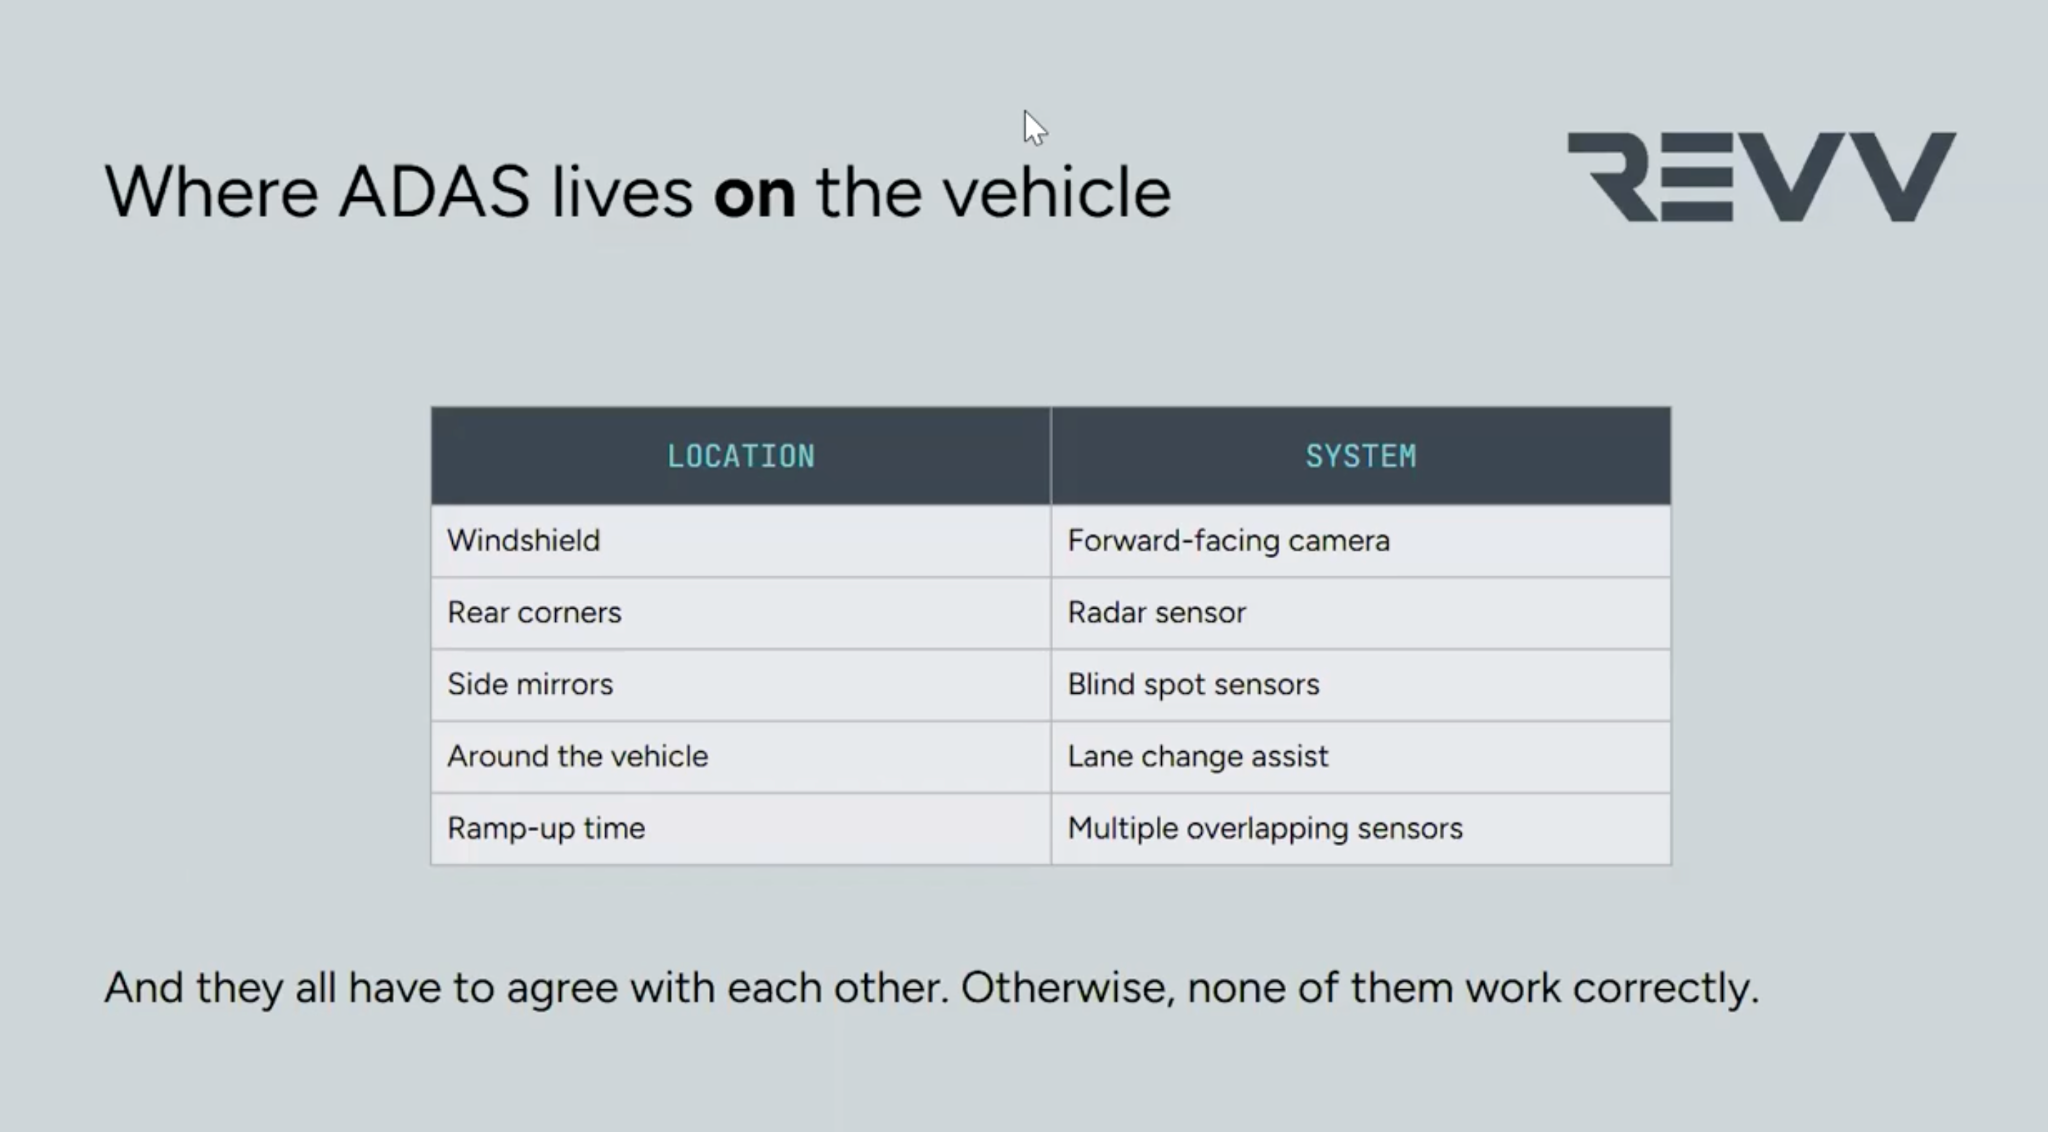
Forward facing cameras sit behind the windshield, usually in the upper portion near the rearview mirror, but a few outliers exist. The Rivian and Amazon delivery vans mount their forward facing cameras low on the windshield, though that spot still sits near the top of a regular passenger vehicle's glass.
Radar sensors sit in the front fascia, often behind the emblem, or tucked into the rear corners of the bumper. Ultrasonic sensors live in the bumper covers themselves, and sometimes along the sides of the vehicle. These are general placements that can vary from manufacturer to manufacturer.
None of this is visible once a repair is buttoned back up. A radar sensor behind a freshly painted bumper cover, a camera bonded to glass, a sensor tucked behind an emblem: all of it disappears the moment the car looks finished. Knowing where sensors sit is important in repair because they tend to be in places that need attention often.
Ron made a point in the August session, System Architecture Masterclass: How Modern ADAS Platforms Actually Work, that ties directly into this:
"Every one of those locations is inside the damp zone of a collision and must be verified or validated after repair."
What does he mean by damp zone? The places these sensors live are the places most likely to get touched, bumped, repainted, or removed during a repair.
What does calibrating a sensor actually do?
Here's a misconception Ron corrected directly in the August session, and it's worth getting right because it reframes almost everything else. Many assume that when you calibrate a sensor, you're rewriting how the sensor perceives ‘zero’ based on wherever the technician happened to position the target. Here’s what Ron had to say:
"Engineers would not allow a technician to position targets in front of the vehicle wherever he wants, push a button, and say here are the new numbers, we'll work with this now. Basically, what we're doing is not really calibration. It's more of a validation of the component."
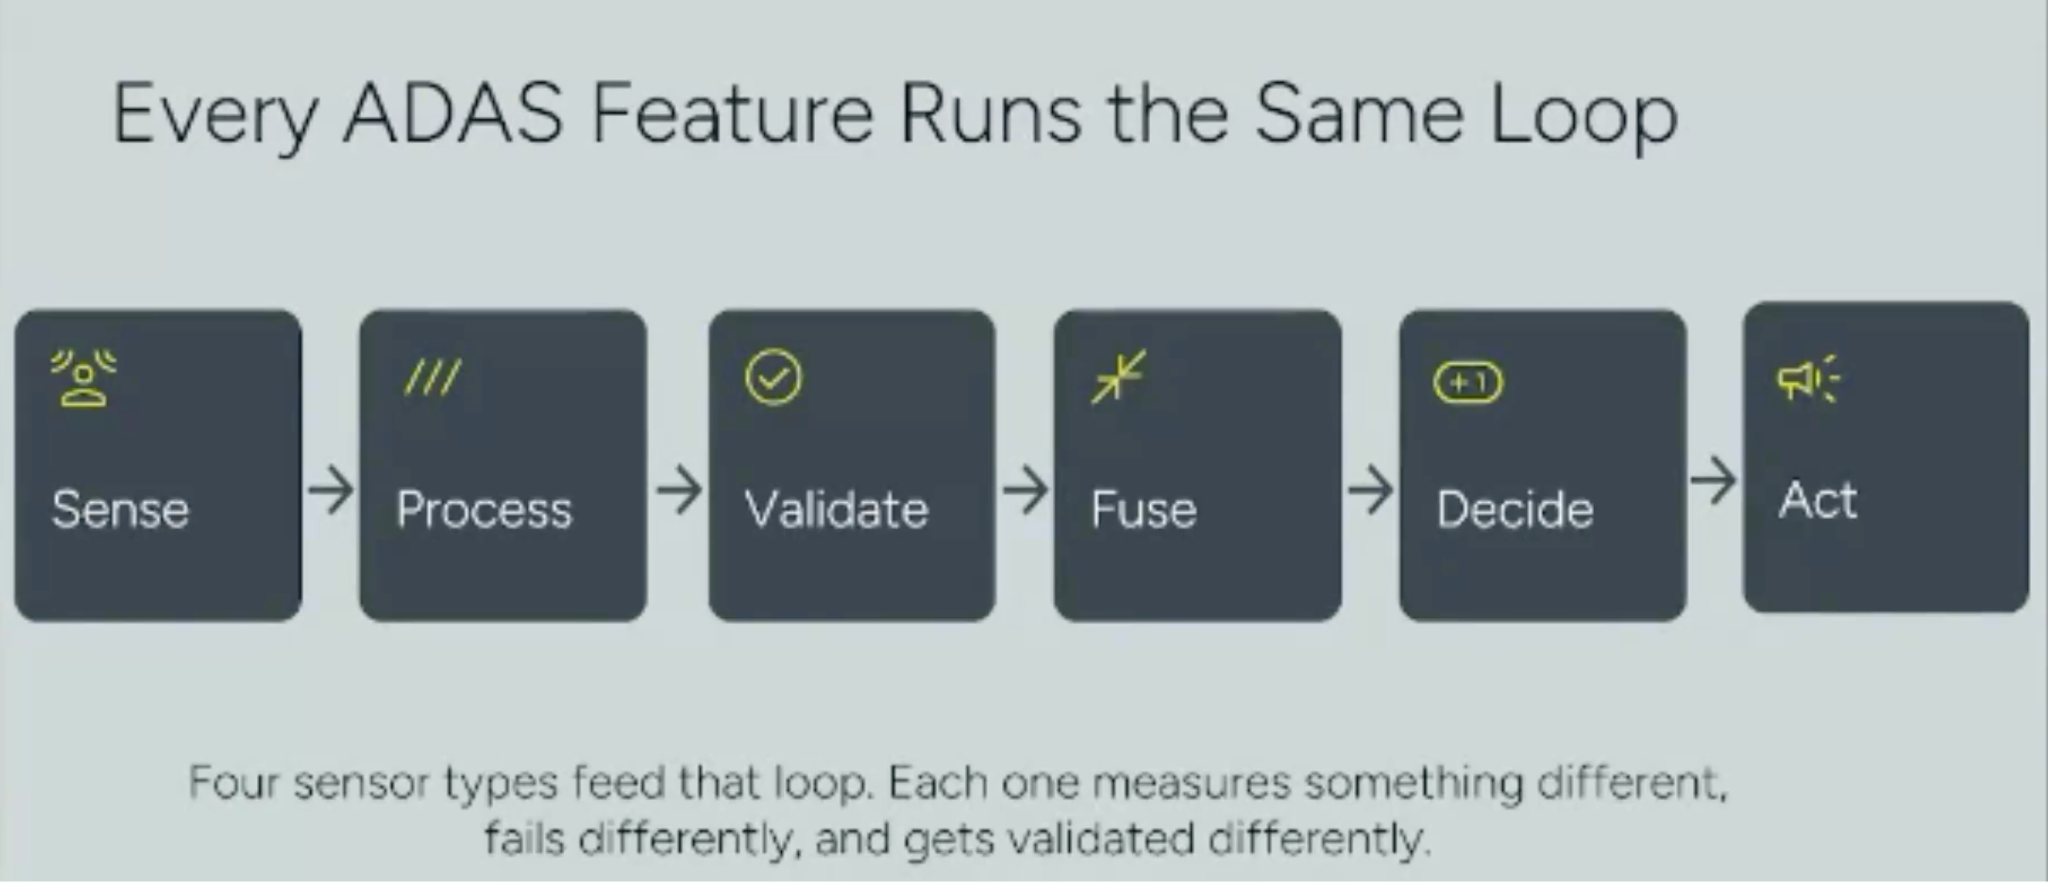
Every sensor type, whether it's a camera, radar, LiDAR, or ultrasonic unit, runs the same basic loop: sense, process, validate, and in many cases fuse its data with another sensor before deciding what action to take. A camera detects light and converts it into an image that has to be processed and interpreted. That processing is not trivial. Ron explains that these sensors deal with a heavy influx of data, for example:
"The forward facing camera is an eight megapixel camera, so it takes eight million pixels thirty times a second. That's 248 million pixels that will have to be processed in one second."
When you run a calibration, the system is comparing what the sensor sees against a known reference point, like a target placed at a precise distance, height, and offset from the vehicle. If the sensor's read on that target matches what the software expects, the position is confirmed. If a technician keeps repositioning the target and hitting the calibrate button until it happens to pass, nothing has actually been corrected. Some of the better equipment on the market, Tru-Point and Autel among them, is built specifically to prevent that kind of workaround. If the stand isn't where it needs to be, the system won't let you force a pass.
Why doesn't a clean scan mean a safe vehicle?
Why a clean scan doesn’t necessarily mean a completed calibration was close to the central message of the May session, Meet the Sensors: Cameras, Radar, Ultrasonics, and Where They Live. A pre-scan tells you whether modules are communicating with each other. It does not tell you whether a sensor is aimed correctly. The majority of calibration triggers never show up as a code at all.
Modern ADAS sensors don't always self-report when they're misaligned. They respond to what they think they're seeing, and a sensor that's a couple of degrees off is still doing exactly what it was built to do. It's just aimed at the wrong thing, whereas a code may tell you if the sensor just isn’t working at all.
There's a story from the May session that makes this concrete. A shop had recently calibrated a vehicle’s forward facing radar. The customer brought it back complaining that every time they drove under an overpass, the brakes would engage on their own. It turned out the radar was pointed a couple of degrees up behind the bumper cover, and it was reading the overpass as an object directly in front of the vehicle. The system wasn't malfunctioning. It was doing precisely what a misaimed sensor is supposed to do, therefore Ron urges:
"A clean scan does not confirm a safe vehicle."
The August session added a second version of this same problem, one that's even harder to catch because it doesn't require a full recalibration miss, just a small nudge. Ron described a pattern he'd seen on Amazon delivery vans, where a driver hits a snowbank, the plastic bumper pushes in, and it bends the radar bracket just enough to throw the sensor out of position. No fault code appears. The driver just notices something feels different.
"You may not get a code for that, but the vehicle may not behave as it was behaving before. The customer may complain that … it seems like the cars are a little closer on this side than they used to be."
Slight misalignments can cause whole systems to be in disarray, like engaging Automatic Emergency Braking under an underpass, or throwing off Blindspot Monitoring when a vehicle isn’t actually there. Neither of these scenarios would trigger a DTC, as both of the sensors are still ‘working’ in these scenarios. Therefore it is vital to know that a clean scan does not mean a sensor is correctly calibrated.
How much does a fraction of a degree matter?
This is where both webinars really urge the same message, and it's probably the single most useful number in either presentation. A one degree aim error is basically nothing of an error just 1 or 2 feet in front of the bumper, but quickly becomes a real problem the farther out you go.
"A one degree deviation will give me a 1.75 m, or 5.6 ft, almost 6 feet offset. That's at 300 feet."
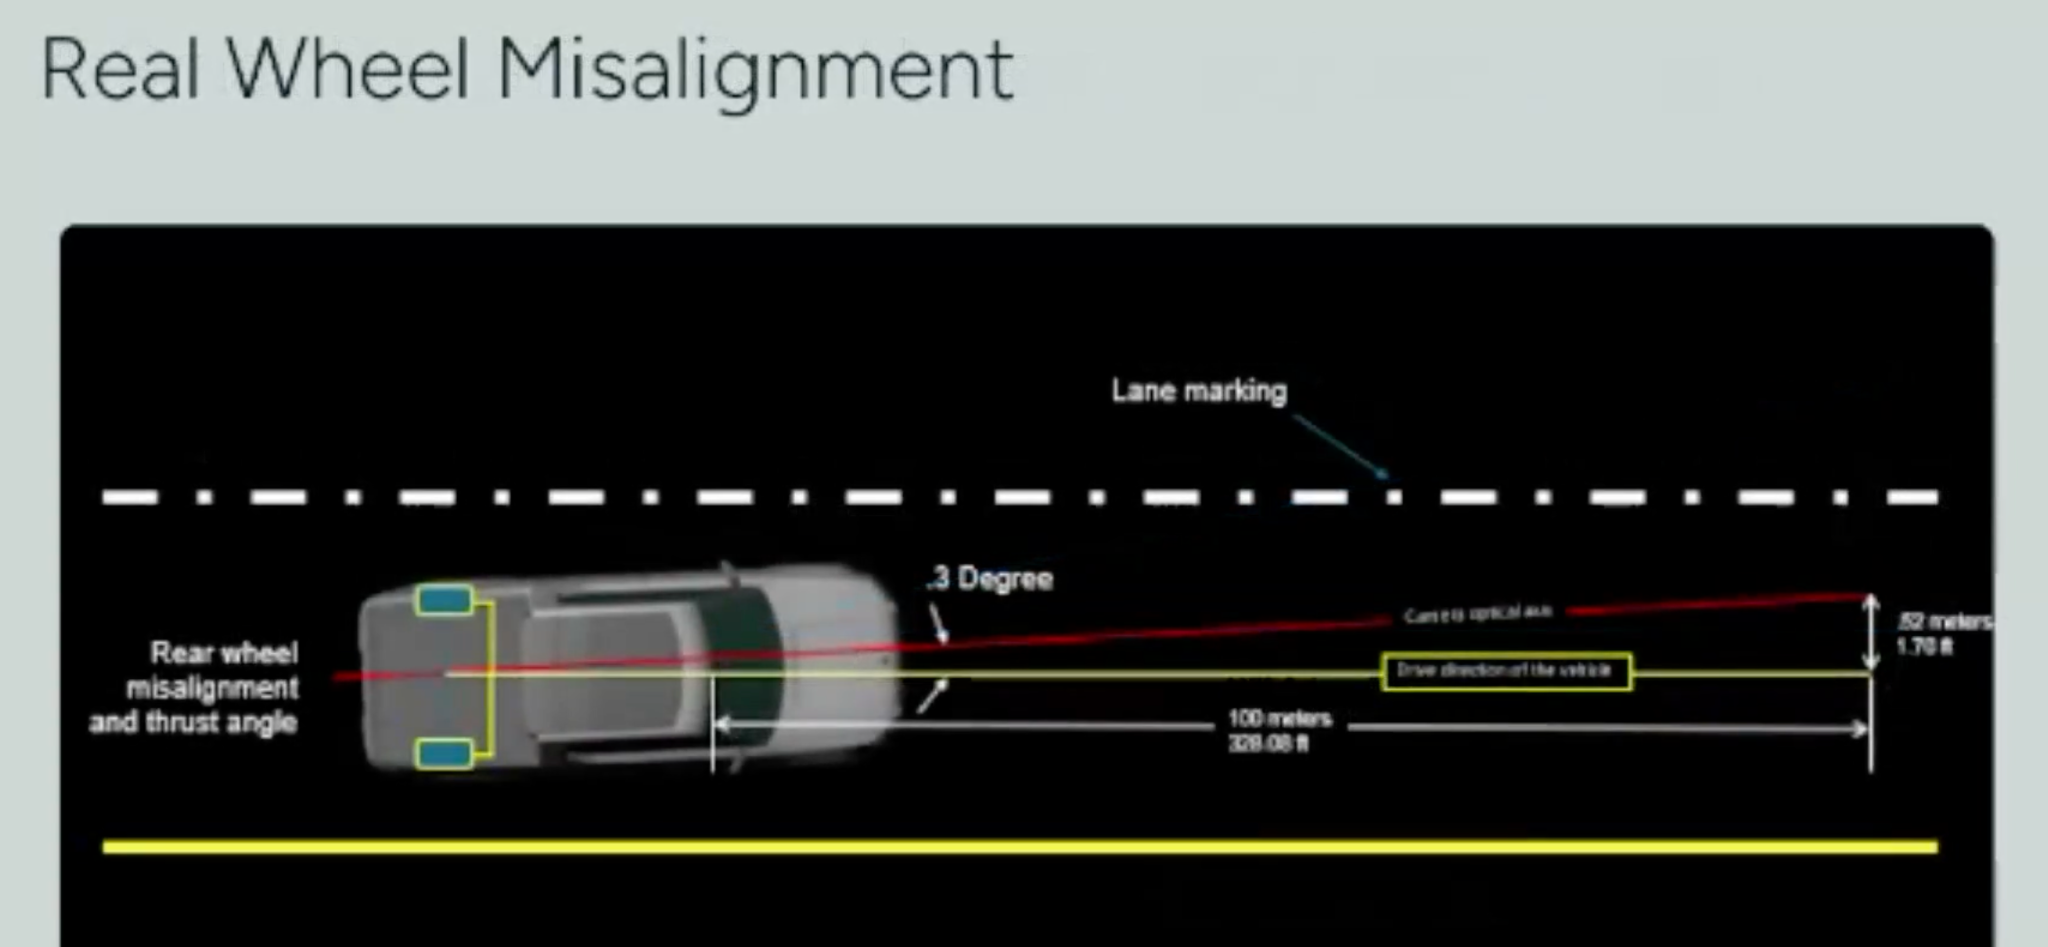
A 6 foot error at 300 feet of distance isn't a rounding error. That's the difference between a sensor correctly reading the lane ahead and a sensor reading the shoulder, or a parked car, or nothing at all. And this isn't just a hypothetical worst case. Even OEM manufacturing tolerance typically runs around plus or minus 0.3 degrees. Ron explains:
"At 100 meters, 0.3 degrees is still 1.7 feet off the preferred centerline. So it would be 3.4 feet, if you look at both sides of the centerline."
If a vehicle straight off the assembly line, built to spec, still carries that much variance, it's not hard to see how a bent bracket, a twisted target stand, or a rear alignment that's slightly off spec turns into a genuinely unsafe outcome once the sensor is doing its job at highway speed.
Which everyday repairs trigger a calibration shops don't expect?
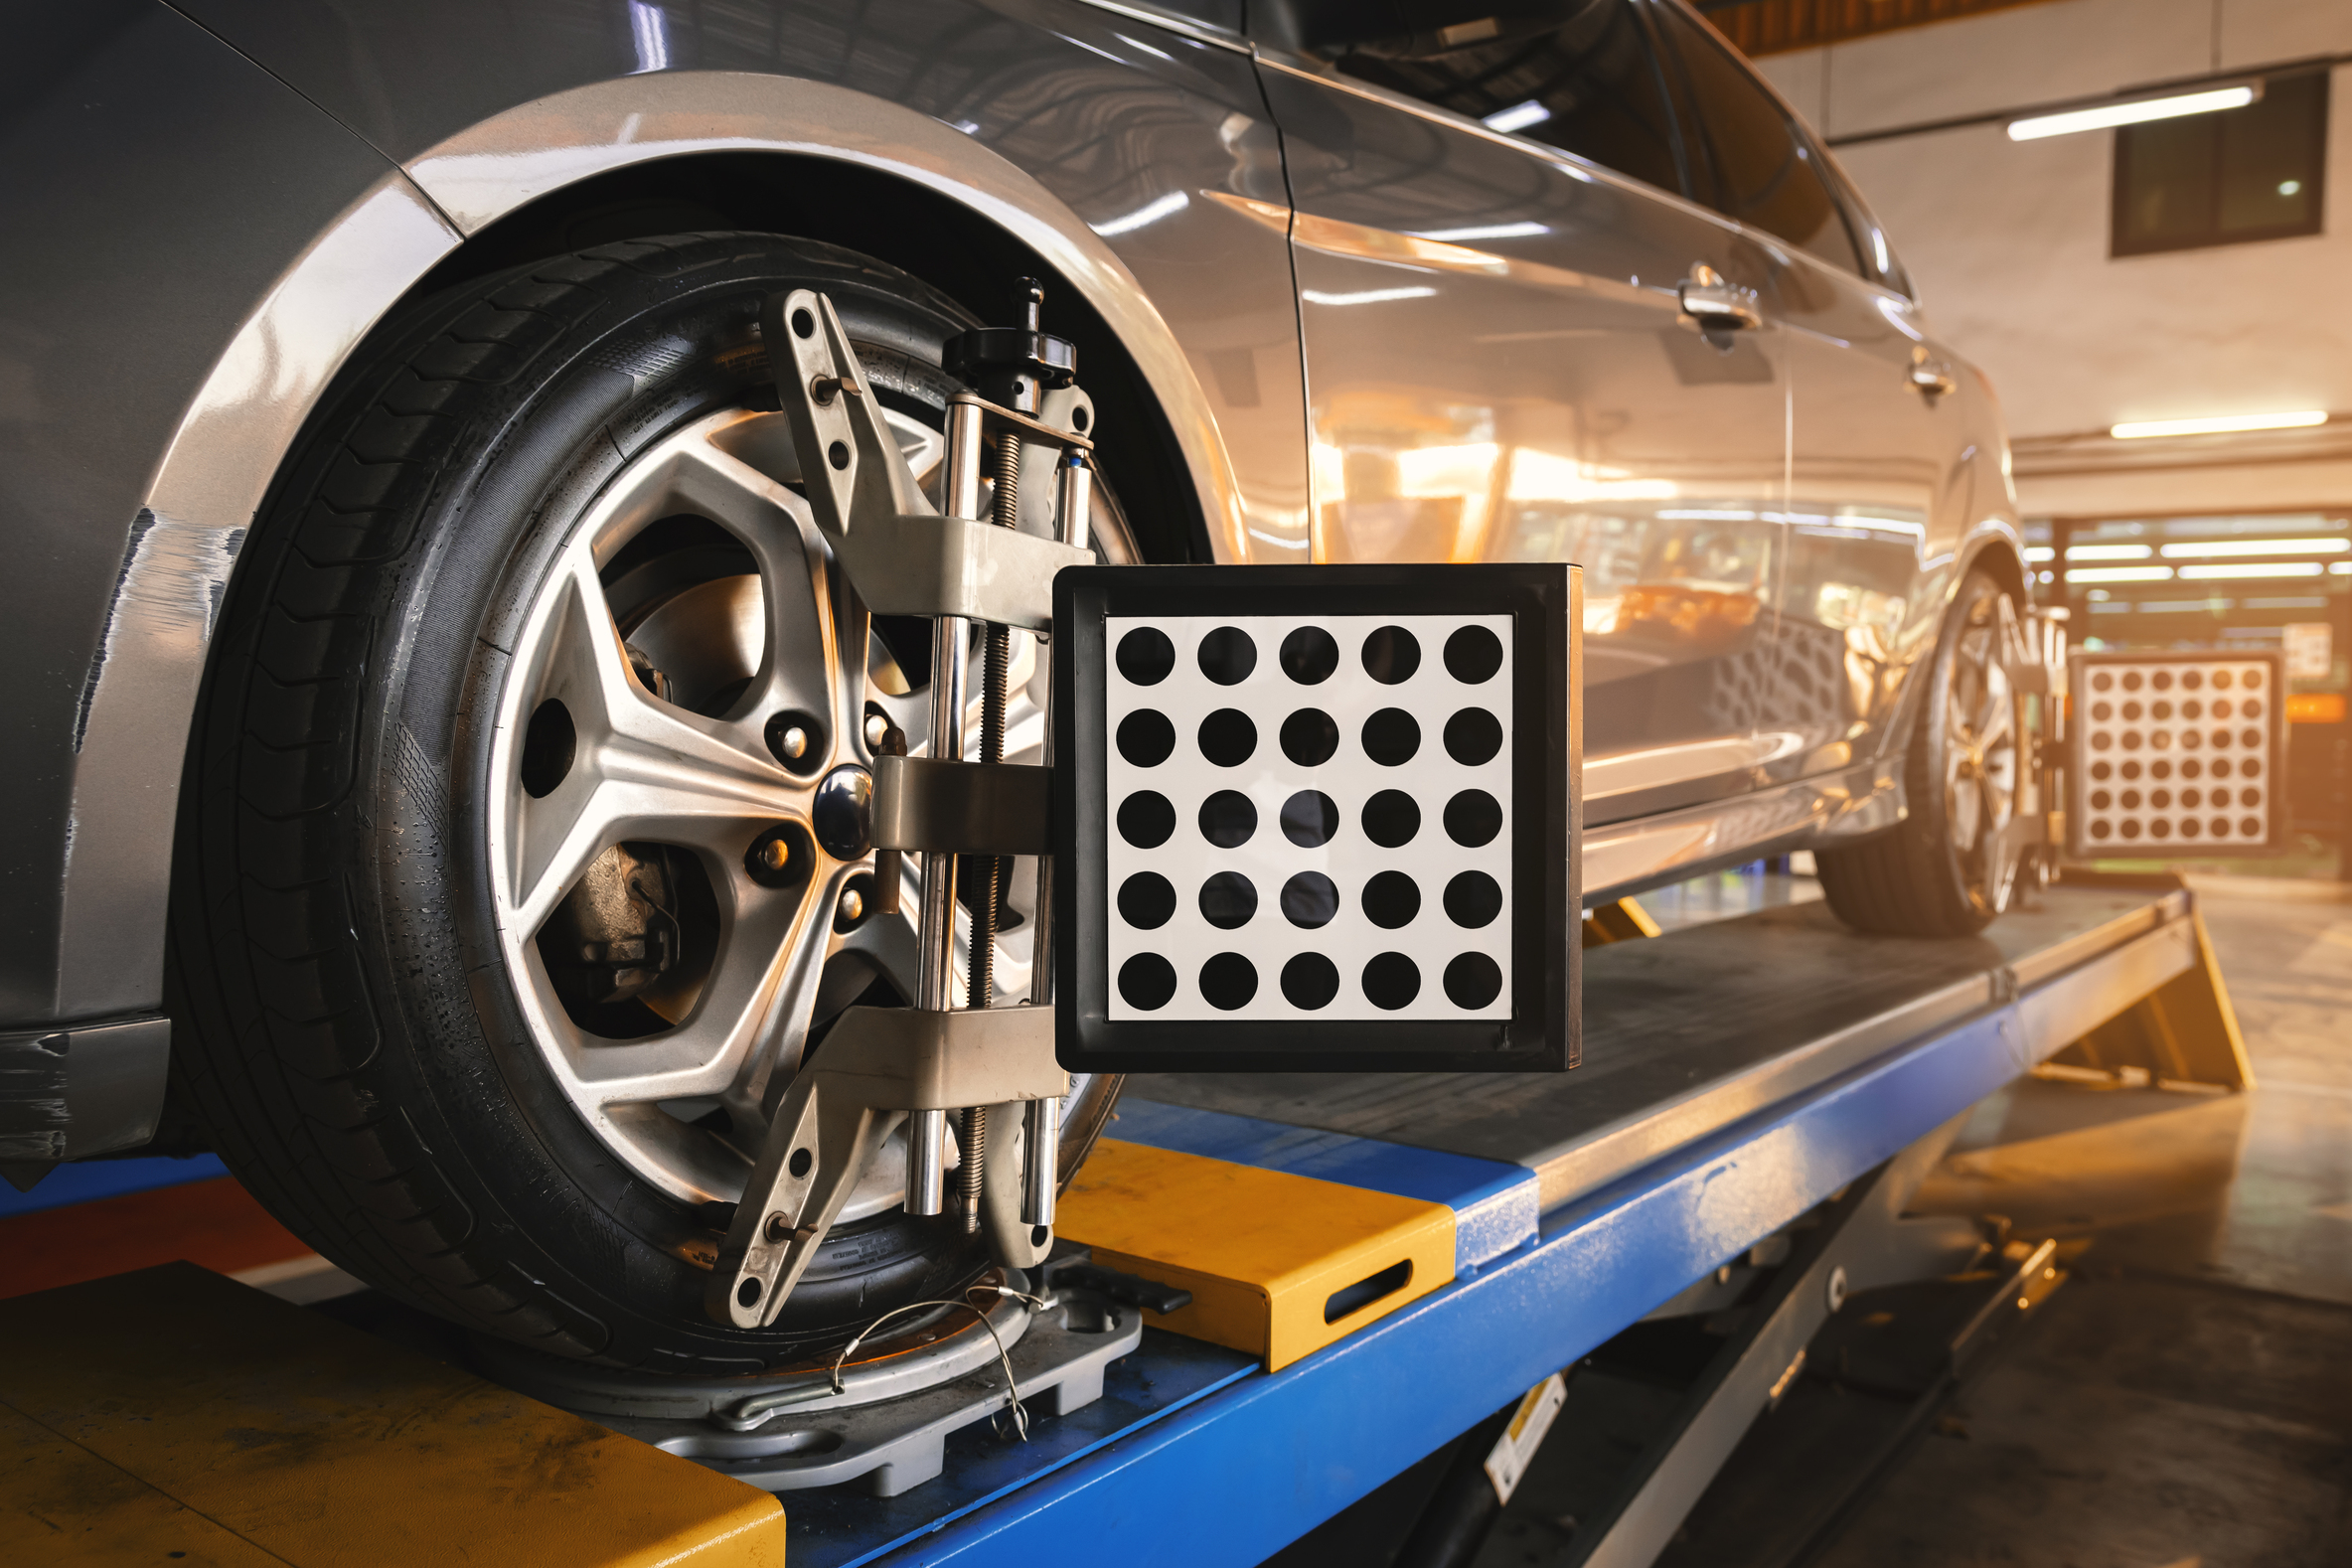
Windshield replacement and bumper work are the obvious triggers. Most shops have that instinct by now. The list gets longer, and less obvious, from there: wheel alignments, suspension work, ride height changes, paint refinishing, and bracket disturbance can all require a calibration, even when the repair itself has nothing to do with a sensor directly.
Alignments are probably the biggest blind spot. According to the May webinar, fourteen OEMs currently require a calibration following a wheel alignment. Nissan runs the process in the opposite direction and requires the alignment to happen before the front radar calibration. That kind of variation is exactly why guessing at the order of operations, instead of checking the OEM procedure for that specific vehicle, gets shops into trouble.
The August session makes a point that doesn't come up as often as it should about ride height. Calibration specifications are written for a vehicle sitting at its factory design height, meaning correct tire size, correct pressure, correct tread depth, and no extra load in the vehicle. A lowered or raised vehicle is a vehicle that the OEM never wrote a calibration spec for.
"You unraise it. It wasn't designed that way. Whoever raised it redesigned the vehicle and needs to resupply specifications."
Hail season deserves a mention too, especially for shops in the Midwest. Paintless dent repair work often means lowering the headliner on a vehicle with a forward facing camera mounted behind the rearview mirror. Even if nobody unplugs the camera outright, it's easy to bump or shift it slightly during that process, which is reason enough to check it before the car goes back to the customer.
What does a complete ADAS calibration workflow look like?
Ron breaks this down into 5 steps in the May webinar, and the value is in applying them to every vehicle that comes through the shop, not just the ones that look like they'll obviously need it.
The steps include:
- Identify what OEM procedures and calibrations apply to the vehicle in front of you.
- Complete the physical repair.
- Perform the calibration.
- Verify with a post scan and a functional or road test.
- Document everything, from position statements to images to the procedures themselves.
That first step, identifying what actually applies to a given vehicle, is where a lot of shops lose time they don't need to lose. It's also exactly the kind of research burden that Revv's VIN lookup relieves, surfacing the current OEM requirements for that specific vehicle instead of leaving a technician to dig through separate manufacturer portals mid teardown.
The documentation step at the end of the process, the one Ron and Joel Adcock both called impossible to overdo, is the same piece Revv auto generates for insurance and liability purposes. Shops that build the identification step into their process at intake, rather than discovering a missed trigger at post scan, tend to catch far more of these before they become a comeback.
None of this requires new equipment. It's a process and a training shift, applied consistently, to every single vehicle.
How do you talk to a customer who doesn't think anything's wrong?
Of everything covered across both sessions, this was the one Joel told attendees to write down above all else. A customer who dropped their car off for a bumper repair usually isn't thinking about their forward facing radar. If a calibration shows up as a line item with no explanation, it reads as an upsell.
The framing that tends to land is simpler than a technical explanation of targets and thrust angles. The repair restores three things: what the vehicle sees, what it interprets, and how it reacts. Customers don't push back on "we're making sure your car can see the road correctly again." They push back on unexplained charges. That one shift in language does more work than most shops give it credit for, whether the job is customer pay or insurance pay.
Calibration is a validation that the vehicle can still see, measure, and react the way its engineers intended, and a fraction of a degree is the difference between that working and not. Building the identification step into intake, instead of discovering a missed trigger later, is the single change that saves the most rework, and it's the piece of the process Revv was built to shorten.
Set up a call with an expert at Revv to see how Revv fits into your ADAS workflow.
Frequently Asked Questions
Do all ADAS sensors work the same way?
No. Cameras, radar, ultrasonic sensors, and LiDAR each sense the world differently, using light, radio waves, sound, and laser pulses respectively. But they all run the same underlying loop: sense, process, validate, and act, often fusing more than one sensor's input together in a matter of milliseconds before the vehicle responds.
Does a passed prescan mean the ADAS systems are working correctly?
No. A prescan confirms that modules are communicating, not that a sensor is correctly aimed. The majority of calibration triggers never surface as a fault code, and a misaligned sensor will keep reporting what it thinks it sees without ever flagging that anything is wrong.
What actually happens during an ADAS calibration?
The system compares what a sensor detects against a known reference point, a target placed at a precise distance, height, and offset, to confirm the sensor is sitting where the manufacturer intended. It's a validation of position, not a rewrite of the sensor's internal settings.
How much does a small calibration error actually affect driving?
More than what it looks like up close. A one degree aim error is barely noticeable a few feet from the bumper but turns into several feet of real world offset at highway distances, enough to misread where an object actually is or trigger a safety response that shouldn't have fired.
What repairs require an ADAS calibration?
Windshield and bumper replacement are the obvious ones. Wheel alignments, suspension work, ride height changes, paint refinishing, bracket disturbance, and even paintless dent repair near a windshield mounted camera can all trigger a required calibration.
What should a shop's ADAS calibration process include?
Five steps, applied to every vehicle: identify which OEM procedures and calibrations apply, complete the physical repair, perform the calibration, verify with a post scan and road test, and document the full process for insurance and liability purposes.