Table of Contents
Every experienced tech has seen it: a vehicle comes back after an ADAS calibration job, and somebody has to figure out why. 9/10 times, the answer isn’t that the calibration was done wrong, rather, something upstream didn’t get caught but the calibration went ahead anyway.
The pattern is consistent enough that most shops have internalized it to some extent, but few have actually mapped it out and haven’t been able to close the gaps.
The real cost of a redo is a bay tied-up again, a customer who is now skeptical, and a second round of justification to an insurer who already signed off on the job once. The downstream friction starts with one missed step upstream.
This guide provides a diagnostic method that catches those upstream problems before they turn into a redo.
Where rework actually originates (Spoiler: It’s rarely the calibration itself)
Ask a shop to describe their last ADAS redo and they’ll usually frame it as a calibration problem, but dig deeper and you’ll find that it’s almost never a calibration issue.
The actual root causes boil down to a short list:
- An unresolved DTC that was still active when the calibration ran
- A repair or parts issue that didn’t get caught before the vehicle moved to calibration
- A wrong assumption about which systems needed calibration for that specific vehicle in the first place
- A missed prerequisite such as a wheel alignment, or vehicle curb weight (full tank of gas, empty truck, etc.)
These aren’t calibration method-specific failures, rather have more to do with sequencing and estimation errors.
Failure points become obvious when mapping a typical workflow that includes:
- Pre-scan
- DTC resolution
- Requirement confirmation
- Repair verification
- Calibration
- Post-scan
- Documentation
A gap at any step creates a problem, but the earlier in the map it occurs, the more it costs if not found until the vehicle returns for a redo. A missed DTC caught at pre-scan is a minor delay, but the same missed DTC caught after calibration is a redo.
This reframes the whole problem into preventing rework by tightening the steps than happen before you calibrate.
The sequence that catches problems before they become redos
A defensible diagnostic sequence looks like this, in order:
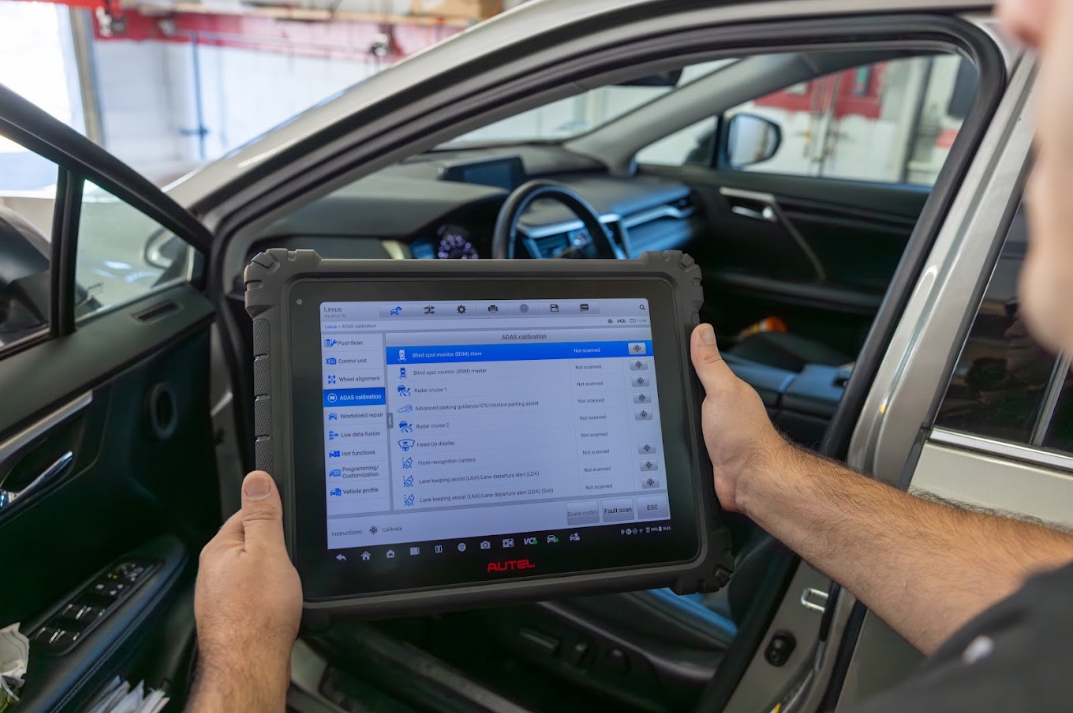
Full pre-scan
Perform the entire scan, not a quick check on the affected systems. A full vehicle scan that surfaces every active and pending code. You need the complete picture before anything else moves.
Resolve and check all relevant DTCs
Clear all codes, verify they do not return and confirm all systems are operating as designed before proceeding with the calibration. A code that clears and returns immediately tells you something the calibration won’t necessarily fix.
Confirm exactly which calibrations the VIN requires
Don’t rely on memory or on what you think “this model usually needs”. OEMs change their positioning regularly and trim packages carry different calibration needs. Check the specific VIN, trim level, and build to see what current OEM Service Information about calibration needs.
Verify the repair and parts meet the conditions of the calibration
Calibrations have manufacturer requirements that must be met in order to justify performing the calibration. When a calibration meets the requirements to be performed, there are prerequisites that must be met. Examples, but not limited to, would be:
- Sensor Installation Angle
- Repair exclusions (Parts that can be repaired vs have to be replaced)
- Wheel alignment
- Tire pressures
- Vehicle Curb Weight
Following OEM Service Information helps avoid performing a calibration in a condition it wasn’t designed for.
Perform Calibration
At this point, if the sequence has been followed correctly, then there should be no variables from upstream that typically cause redos.
Post-scan
This is not a formality. This step confirms the calibration was successful and that nothing needs to be redone.
Document as it happens
Document each step as it happens to ensure you’re not trying to piece everything back together after work is already done and the vehicle is gone.
The order matters as much as the steps as calibration before DTCs are fully resolved is one the most common ways that a shop ends up running the same procedure twice. The code that only “seemed” resolved comes back to bite you. The calibration that appeared to be completed successfully can crumble under certain conditions. In these scenarios, the redo was baked in before the tech ever started the procedure.
The sequence-breaking mistakes that quietly cause the most redos
These are the specific points where the sequence tends to collapse, and where you may recognize some of your own mistakes.
- Calibration before DTCs are fully cleared - Clearing codes and waiting to see if they come back is not optional. A code that re-appears tells you the calibration is premature
- Not confirming what the VIN actually requires - Trim-level variation and mid-cycle production changes mean that model-general assumptions fail more often than most shops realize until a job comes back.
- Skipping a final repair and parts verification - If calibration has positional, alignment, or component-condition prerequisites, those need to be confirmed.
- Treating post-scans as a formality - A review of post-calibration live data on affected systems and a successful post-scan is how you know the difference between “appeared to be complete” and “actually completed”.
- Documenting from memory - After-the-fact documentation often surfaces a missed step or can present issues related with relying on memory. Real-time documentation is how to avoid these issues as well as build defensible insurance claims that are easy to reference in the case of partial payments.
Where the sequence most often breaks down and how to close that gap
Of all the steps in the workflow, the requirement confirmation step is where shops most reliably default to memory, a spec sheet from a previous job, or a general trim assumption instead of current, VIN-specific OEM data.
That’s exactly where a wrong assumption sends an entire job sideways and it’s particularly costly because the mistake isn’t visible until the work is done or the customer comes back.
The fix is straightforward: remove the guesswork at this specific step and confirm requirements against VIN-specific, current OEM data.
That’s where Revv’s VIN lookup and current OEM requirement data comes in. It turns “what does this model usually need” into “what does this specific vehicle require, per the current OEM specs”. Shops that confirm requirements against current, VIN-specific data at this step typically catch mismatches before they become a second trip through the bay. That’s the gap this step in the sequence is supposed to close in the first place.
A quick self-check for auditing your own workflow
Pull the last several jobs that required a redo or a comeback. For each one, trace the failure back to the specific step in the sequence where it actually broke down. Don’t accept a simple “the calibration failed” as the answer tends to originate earlier in the workflow.
What you’ll almost certainly find is that the failures point to similar origins. Most will trace to one or two steps, often DTC resolution or requirement confirmation. That clustering tells you exactly where your workflow needs tightening and it’s a much more useful signal than “we need to be more careful”. This gives you a specific place to focus and create change.
The shops that have the fewest ADAS comebacks are the ones who’ve figured out which two steps they most need to improve before the calibration even starts.
Rework is a sequencing problem
ADAS calibration rework almost always traces back to one or two specific steps down out of order or skipped entirely. The calibration procedure itself is rarely where things go wrong.
The diagnostic sequence that prevents rework isn’t complicated: pre-scan, DTC resolution, repair verification, calibration, post-scan, and documentation throughout the process. The difficulty is executing these steps in order, every time, without substituting assumptions for data at the step where assumptions fail most often.
That requirement-confirmation step is where Revv removes the guesswork, If your shop is still confirming ADAS requirements against model assumptions or last-job memory, that’s the gap most worth closing.
Set up a call with one of our experts to see how you can audit and improve your shop’s diagnostic workflow.
FAQs
Q: What diagnostic steps help prevent ADAS calibration rework?
The sequence that prevents most rework runs in this order: full pre-scan, complete DTC resolution with re-verification, confirmation of VIN-specific calibration requirements (not model-general assumptions), repair and parts verification, calibration, and post-scan. Each step closes a gap that would otherwise surface as a redo. Skipping or reordering any of these, particularly DTC resolution and requirement confirmation, is where most rework originates.
Q: Why do ADAS calibrations sometimes need to be redone?
The root cause almost always traces upstream of the calibration itself. The most common culprits are an unresolved DTC that was still active when calibration ran, a parts or repair issue that wasn't verified before the calibration step, or an incorrect assumption about which systems required calibration for that specific vehicle. The calibration procedure itself is rarely the failure point.
Q: What's the correct order of operations before an ADAS calibration?
Full pre-scan first, then complete DTC resolution and re-verification, then VIN-specific requirement confirmation, then repair and parts verification, and only then calibration, followed by post-scan. The order matters as much as the steps. Skipping or reordering these is what creates rework; the calibration procedure itself is rarely the issue.
Q: How can shops reduce comebacks on ADAS-related repairs?
Tighten the steps that happen before calibration, particularly the requirement confirmation step. Shops that default to memory or general model assumptions instead of current, VIN-specific OEM data are the ones most likely to confirm the wrong requirements and end up redoing the job. Confirming against actual OEM data for the specific vehicle at the moment of confirmation is the most reliable lever for reducing comebacks.
Q: Is post-scan really necessary if the calibration appeared to complete successfully?
Yes — post-scan is the actual confirmation step, not a formality. A calibration that "appears" to complete successfully can still leave an unresolved condition that only a post-scan will surface. "Appeared to complete" and "actually completed under the right conditions" are not the same thing, and post-scan is how you tell the difference. Skipping it means you're documenting based on assumption, not confirmation.
Q: What's the most common point where ADAS workflows break down?
Confirming exactly which calibrations a specific vehicle requires. This is the step where shops most often substitute memory, a generic spec sheet, or a previous-job assumption for current, VIN-specific OEM data, and it's precisely where a wrong assumption sends the whole job sideways. Shops that confirm requirements against current OEM data tied to the actual VIN at this step catch mismatches before they become redos rather than after.